Статистика
Всего: 1 Гости: 1 Юзеры: 0 |
How to paint in Photoshop using a mouse
Welcome to my very first tutorial in which I am going to show you how
to do a nice looking paintings using just a mouse. Halloween is coming
soon so let's paint a pumpkin:-)
The tutorial and other samples can be also found on my web.
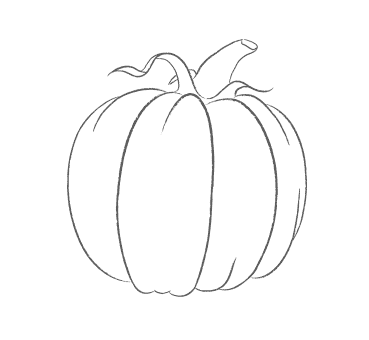
Step 1 - The Outline
- Create an outline of the pumpkin in Illustrator (or use mine).
- Open up Photoshop and create a New Document with a white background.
-
Put your outline into this new document (have both outline.ai and new
document opened in Photoshop and drag and drop the outline into this
new document with "move tool (v)").
- This should create a new layer. Name it outline, set blending to multiply and opacity to 60% - 70%.
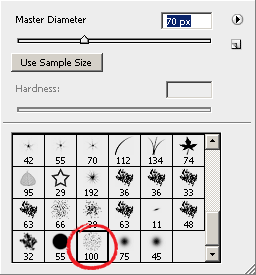
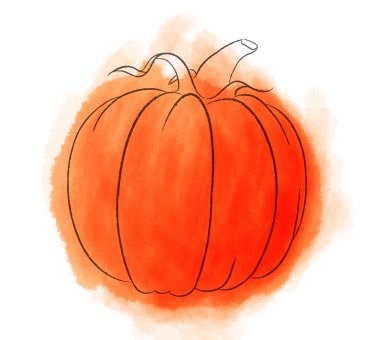
Step 2 - The basic colour
- Create a new layer under the outline layer and name it orange.
- Choose a basic colour of your pumpkin (I chose R:255 G:120 B:0).
-
Click on the brush tool, from the list of available brushes choose
Rough round bristle, leave blend mode to normal for now, but change
opacity to 50%. Fill the entire area of the pumpkin with only one
stroke.
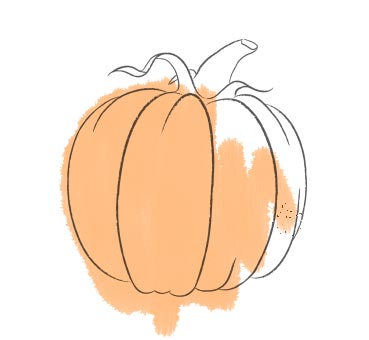
Now that's your basic colour on which you can add more colour, shades, lights and more details.
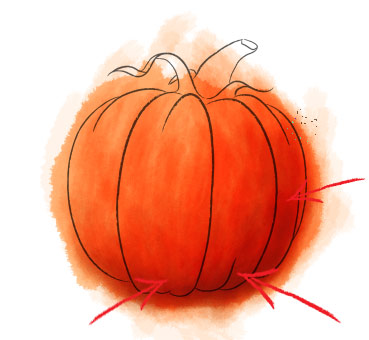
Step 3 - Casting shadows
And now we are going to create a basic round shape of the pumpkin.
- Set the mode of your brush to multiply and change opacity to 10% - 15% depending on how rough you want your painting look.
-
Create many many brushstrokes. Just point, click, drag shortly and let
off and do this in a really fast pace all over your pumpkin. Do more of
them in the areas you want to have darker and less in the areas you
want lighter.
In a few moments we should get something like this:
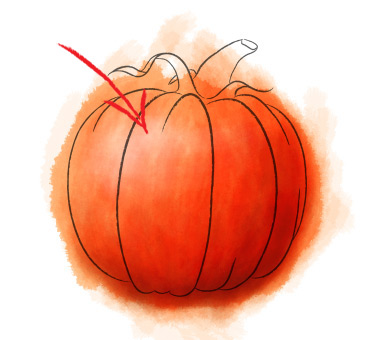
-
As you can see, wee can use a little more shadows in the darker area.
Choose a darker tone of orange colour (I chose R:187 G:88 B:1), set the
opacity to 7% and continue coloring the pumpkin.
Step 4 - Casting reflections
We
have a pretty good looking pumpkin now right? But not only the shades
make our pumpkin look three-dimensional, it's also the light
reflections.
- Make another layer above the orange layer and name it reflections.
- Change the brush colour to white, set mode back to normal and start casting the reflections with a lot of brushstrokes.
- If needed, you can use the large eraser brush with hardness set to "0" and soften the reflections.
Step 5 - Finishing, postprocessing...
So,
the basics of painting in Photoshop are pretty much covered. You can
get rid of the unwanted brushstrokes around the outline using Polygonal
Lasso tool or whatever you prefer. Now you know everything you need to
continue painting other shapes on your pumpkin.
If you cast
shadows close to the reflections you can give your pumpkin even more
three-dimensional look. Give it a nice matching colour background, play
with it, experiment...
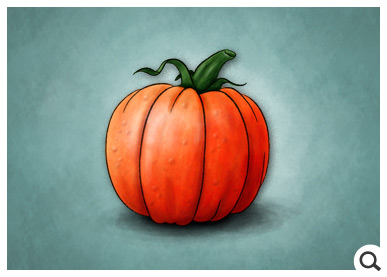
Ready pumpkin...
Since this is my first tutorial, I'd be more than happy for your feedback.
Happy Halloween!
Marko
http://www.sxc.hu
|
| Категория: Уроки Photoshop | Добавил: MyPuK (09.11.2008)
|
| Просмотров: 820
| Рейтинг: 0.0/0 |
Добавлять комментарии могут только зарегистрированные пользователи. [ Регистрация | Вход ] |
 |

